I wanted to save money and make my home smarter. So I decided to install a new thermostat myself.
I had never done it before, but I knew I could learn. I spent time reading instructions and checking my system.
I didn’t want to mess anything up, so I kept it simple. I took safety seriously and followed each step closely.
The process turned out easier than I thought. It felt good to fix something on my own. If I can do it, you can too. Here’s how I replaced my old thermostat without needing an electrician.
Table of Contents
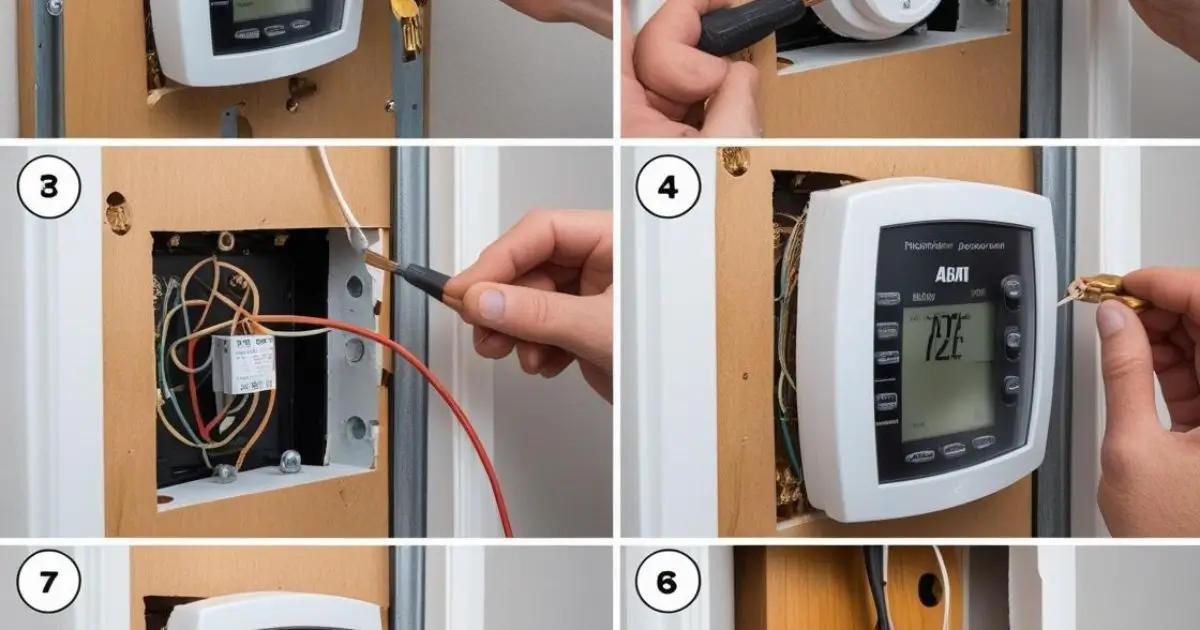
How I Replaced My Old Thermostat With a Digital One
I didn’t want to call a technician for something I could learn.
This was my first thermostat replacement, and I kept it simple.
- Turn off power at the breaker: I shut off the heating system to stay safe.
- Remove the old thermostat cover: It popped off with a little tug.
- Take a photo of the wiring before disconnecting: I used my phone to remember wire positions.
- Label the wires using the new thermostat’s stickers: This kept things organized and easy later.
- Detach old baseplate from the wall: A screwdriver did the job quickly.
- Screw in the new baseplate and reconnect wires: I matched each wire to the right terminal.
- Snap on the new thermostat: It clicked into place without trouble.
- Turn power back on and test the device: I checked if the display lit up and if the heat worked.
Tips:
- Ensure the thermostat is level: It looks better and works more accurately.
- Avoid placing it near heat sources or drafts: That can mess with the readings.
Installing a Thermostat for Central Heating Was Easier Than I Thought
This part made me nervous, but it turned out fine.
I followed simple steps and took my time.
- Confirm compatibility with your heating system: I checked the box and manual before buying.
- Shut off furnace power: I flipped the switch on the furnace for safety.
- Mount the new thermostat base at eye level: I chose a central wall away from direct sunlight.
- Connect wires as per instructions (W, R, Y, G, C, etc.): Each letter matched a wire and terminal.
- Secure and test system heating function: I turned the furnace back on and adjusted the settings.
Note:
- Most central heating setups work with programmable thermostats.
- Always check for the C-wire—many newer models require it.
Installing a Thermostat in My Car? Yes, I Did That Too
My car started running hot, so I took matters into my own hands.
It was quicker than expected and saved me a trip to the shop.
- Disconnect the battery: I made sure no power was flowing.
- Drain the coolant: I used the radiator valve to release it safely.
- Remove hose clamps and old thermostat housing: A socket wrench helped here.
- Take out the old thermostat and gasket: I noted the orientation before pulling them out.
- Clean mating surfaces thoroughly: I wiped away old gasket material with a clean rag.
- Insert new thermostat (spring-side in): I slid it into place just like the old one.
- Attach new gasket and reassemble housing: Everything lined up and sealed tight.
- Refill coolant and reconnect the battery: I topped off the coolant and tightened the cap.
Pro Tip:
- Always use the correct thermostat for your vehicle’s make and model.
Do You Really Need an Electrician? Here’s My Honest Answer
I wasn’t sure at first, but I did my research.
Turns out, most people don’t need one for a basic replacement.
- If you’re replacing a thermostat with similar wiring, no electrician is needed
- However, if you’re unsure about high-voltage systems or lack a C-wire, calling a pro may be smart
- For car thermostats, DIY is totally doable with the right tools
Switching to a Honeywell Thermostat? Here’s How I Did It
I picked Honeywell for its reliability and simple setup.
The app made the process smooth from start to finish.
- Buy a compatible Honeywell model (T5, T9, etc.): I checked system support before buying.
- Download the Honeywell app for guided installation: It walked me through every step.
- Label wires and remove the old thermostat: I kept the setup organized and clean.
- Mount new baseplate and connect wires per guide: I matched each wire to its terminal.
- Install batteries if needed: Some models use backup batteries for safety.
- Snap on display and power it up: It clicked into place easily.
- Follow app prompts to connect Wi-Fi and set schedules: I adjusted temperature settings right from my phone.
Why I love Honeywell:
- Sleek design
- Reliable app integration
- Accurate temperature readings