
Installing an Arlo doorbell is easy and rewarding. This smart device enhances your home security and gives you peace of mind.
With just a few simple steps, you can set it up in no time. First, gather your tools and ensure you have a strong Wi-Fi connection.
Next, download the Arlo app on your smartphone. Follow the on-screen instructions to connect your doorbell to Wi-Fi and customize your settings.
In just minutes, you’ll be able to see who’s at your door, no matter where you are.
Let’s dive into the installation process and get your Arlo doorbell ready to work!
Table of Contents
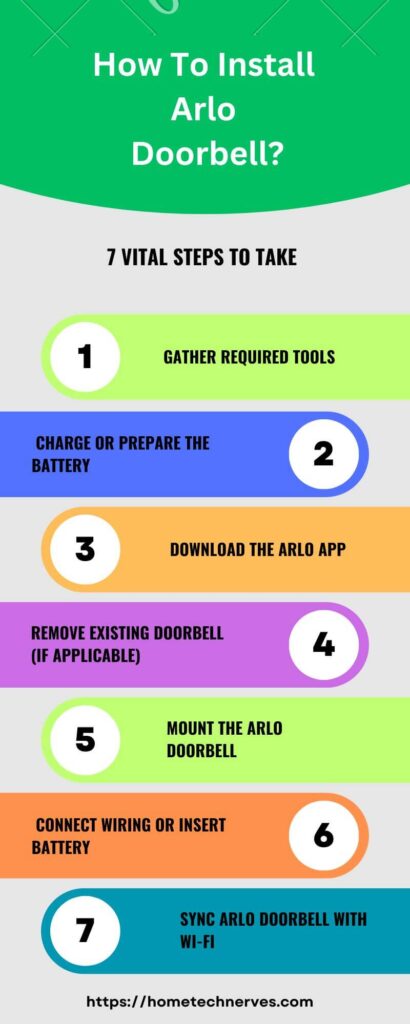
How To Install Arlo Doorbell?
Setting up your Arlo doorbell is a straightforward process that enhances your home security.
With the right tools and a little guidance, you can have it up and running in no time.
Follow these simple steps to ensure a smooth installation.
- Gather Your Tools: You’ll need a screwdriver, a drill, and the mounting bracket included in your Arlo doorbell package.
- Charge the Battery: Before installation, charge the doorbell battery fully for optimal performance.
- Download the Arlo App: Install the Arlo app on your smartphone for easy setup and monitoring.
- Create an Account: Sign up for an Arlo account or log in if you already have one.
- Connect to Wi-Fi: Follow the app instructions to connect your doorbell to your home Wi-Fi network.
- Mount the Bracket: Use the provided screws to attach the mounting bracket to your wall.
- Attach the Doorbell: Finally, snap the Arlo doorbell onto the mounted bracket and ensure it’s secure.
How To Install Arlo Doorbell Wired?
Installing the Arlo Wired Doorbell is a simple way to upgrade your home security. With a few basic tools and following these straightforward steps, you’ll be able to enjoy video monitoring and two-way audio.
Let’s get started on securing your entrance!
- Turn Off Power: Before beginning, turn off the power at your circuit breaker to avoid any electrical hazards.
- Remove the Old Doorbell: Unscrew and disconnect the existing doorbell wires from the wall to prepare for the new installation.
- Connect the Wires: Attach the two wires from the wall to the corresponding terminals on the Arlo doorbell. Ensure the connections are tight for proper function.
- Mount the Doorbell: Position the doorbell against the wall and secure it using the provided screws and mounting bracket.
- Restore Power: Turn the power back on at your circuit breaker to energize the doorbell.
- Download the Arlo App: Install the Arlo app on your smartphone to begin the setup process.
- Follow On-Screen Instructions: Open the app and follow the prompts to connect your wired doorbell to Wi-Fi and customize your settings.
How To Install Arlo Doorbell (2nd Generation)?
Setting up your Arlo Doorbell (2nd Generation) is an excellent way to enhance your home security.
This user-friendly device allows you to monitor your front door from anywhere. Follow these easy steps to install your doorbell and enjoy peace of mind.
- Gather Your Supplies: Ensure you have the necessary tools ready, including a screwdriver, drill, and the included mounting hardware.
- Charge the Doorbell: Before installation, fully charge the doorbell to ensure it functions properly once installed.
- Download the Arlo App: Install the Arlo app on your smartphone for easy setup and remote monitoring.
- Create an Account: Open the app and either log in or create a new account to access your device settings.
- Connect to Wi-Fi: Follow the in-app instructions to connect your Arlo doorbell to your home Wi-Fi network.
- Mount the Bracket: Use the provided screws to secure the mounting bracket to your wall, ensuring it’s level and stable.
- Attach the Doorbell: Snap the Arlo Doorbell onto the bracket, and confirm it’s secure to complete the installation.
How To Install Arlo Doorbell Without Existing Doorbell?
Installing an Arlo Doorbell without an existing doorbell is a fantastic way to enhance your home security.
This wireless device allows you to monitor your entrance effortlessly. By following these simple steps, you can set up your Arlo Doorbell and enjoy its features in no time.
- Gather Your Tools: You’ll need a drill, screwdriver, and the mounting hardware included with your Arlo Doorbell for the installation.
- Charge the Doorbell: Make sure to fully charge the doorbell before starting the installation for optimal performance.
- Download the Arlo App: Install the Arlo app on your smartphone to manage settings and receive notifications.
- Create an Account: Sign up for a new account or log in to your existing Arlo account for access to your devices.
- Choose a Mounting Location: Select a suitable spot near your entrance that has good Wi-Fi coverage and allows for a clear view of the area.
- Mount the Bracket: Use the provided screws to attach the mounting bracket securely to your chosen location on the wall.
- Attach the Doorbell: Snap the Arlo Doorbell onto the bracket and ensure it is securely fastened for reliable performance.
How To Connect Arlo Doorbell To WiFi?
Connecting your Arlo Doorbell to Wi-Fi is essential for accessing its smart features.
This process allows you to receive alerts and monitor your front door from anywhere using the Arlo app.
Follow these simple steps to get your doorbell connected quickly and easily.
- Ensure Wi-Fi Availability: Confirm that your Wi-Fi network is operational and within range of your Arlo Doorbell for a strong connection.
- Download the Arlo App: Install the Arlo app on your smartphone, available for both iOS and Android devices.
- Create or Log Into Your Account: Open the app and create a new account or log in to your existing Arlo account to access your device settings.
- Select Your Device: Tap on the option to add a new device and select your Arlo Doorbell from the list of available devices.
- Follow On-Screen Instructions: The app will prompt you to enter your Wi-Fi network name and password. Ensure you enter the correct information.
- Connect to Wi-Fi: Once you input your Wi-Fi credentials, the app will attempt to connect your Arlo Doorbell to your network. Wait for confirmation.
- Test the Connection: After the connection is established, test your doorbell by pressing the button and checking if you receive notifications on your smartphone.
How To Connect Arlo Doorbell To Phone?
Connecting your Arlo Doorbell to your phone allows you to monitor activity at your front door seamlessly.
With the Arlo app, you can receive real-time notifications, view live video, and communicate through the doorbell.
Follow these straightforward steps to link your Arlo Doorbell to your smartphone.
- Download the Arlo App: Begin by downloading the Arlo app from the App Store or Google Play Store on your smartphone.
- Create or Log Into Your Account: Open the app and create a new account or log in to your existing Arlo account to access your device settings.
- Add Your Doorbell: Tap the option to add a new device, and select your Arlo Doorbell from the list of devices to begin the setup process.
- Enable Bluetooth: Ensure that Bluetooth is turned on your smartphone, as this will help establish a connection with the doorbell during the setup.
- Follow On-Screen Instructions: The app will guide you through the steps to connect your doorbell to your phone, including entering your Wi-Fi details.
- Complete the Setup: Once you’ve entered the necessary information, allow the app to finalize the connection between your doorbell and phone.
- Test the Connection: Press the doorbell button to check if you receive notifications and can view the live feed on your smartphone, ensuring everything is working properly.
What Is The App For Arlo Doorbell?
The app for Arlo Doorbell is the Arlo app, a comprehensive mobile application designed to enhance your home security experience.
Available for both iOS and Android devices, this user-friendly app allows you to monitor your front door in real time.
With the Arlo app, you can receive instant notifications when someone rings your doorbell or triggers motion sensors.
Additionally, you can view live video feeds, record clips, and communicate via two-way audio.
The app also enables you to customize your settings, manage multiple Arlo devices, and access cloud storage for recorded footage, ensuring your home stays secure.
How To Reset Arlo Doorbell?
Resetting your Arlo Doorbell can resolve connectivity issues and restore its original settings.
Whether you’re experiencing problems or planning to sell your device, a reset can help you start fresh.
Follow these simple steps to reset your Arlo Doorbell effectively.
- Locate the Reset Button: Find the reset button on the back or side of the Arlo Doorbell. It’s usually a small, recessed button.
- Press and Hold the Button: Use a paperclip or a similar tool to press and hold the reset button for about 15 seconds.
- Observe the LED Indicator: Watch the LED light on the doorbell. It will flash amber during the reset process and then switch to blinking white once the reset is complete.
- Release the Button: After the LED changes, release the reset button to finalize the process.
- Wait for the Doorbell to Restart: Give your Arlo Doorbell a moment to restart. It may take a minute for the device to become fully operational again.
- Reconnect to Wi-Fi: After the reset, you will need to reconnect your doorbell to your Wi-Fi network using the Arlo app.
- Reconfigure Your Settings: Open the Arlo app and follow the prompts to set up your doorbell as if it were new, adjusting any preferences as needed.
Wrap Up
Installing your Arlo Doorbell is a straightforward process that enhances your home security.
You’ve gathered your tools, charged the device, and connected it to Wi-Fi. Now, enjoy the convenience of monitoring your entrance from anywhere.
With real-time alerts and two-way audio, you can see and talk to visitors effortlessly.
If you follow the steps outlined, you’ll have your doorbell set up in no time. Remember to explore the app to customize your settings and make the most of your new device.
Embrace this smart addition to your home and enjoy peace of mind knowing you’re always connected!
Frequently Asked Questions
How do I install my Arlo Doorbell?
To install your Arlo Doorbell, first mount the bracket, then attach the doorbell. Connect the doorbell to your Wi-Fi using the Arlo app. Ensure the wiring matches your home setup, or use the optional battery for a wireless connection.
Does Arlo Doorbell require wiring?
The Arlo Doorbell can be wired to your existing doorbell system or used wirelessly with a rechargeable battery. If wiring, ensure compatibility with your doorbell chime system. For a wireless setup, simply mount the doorbell and connect it to your Wi-Fi.
How do I sync Arlo Doorbell to my app?
After installing your Arlo Doorbell, download the Arlo app. Open the app, follow the prompts to add a new device, and select “Arlo Doorbell.” The app will guide you through syncing the doorbell to your Wi-Fi and Arlo system for seamless control.
Can I install Arlo Doorbell without a chime?
Yes, the Arlo Doorbell can be installed without an existing chime. It can work wirelessly, and you can receive notifications and alerts directly on your smartphone through the Arlo app. You can also add an Arlo Chime for indoor audio alerts if desired.
Reference:
www.arlo.com. How do I install my Arlo Essential Video Doorbell Wire-Free?
