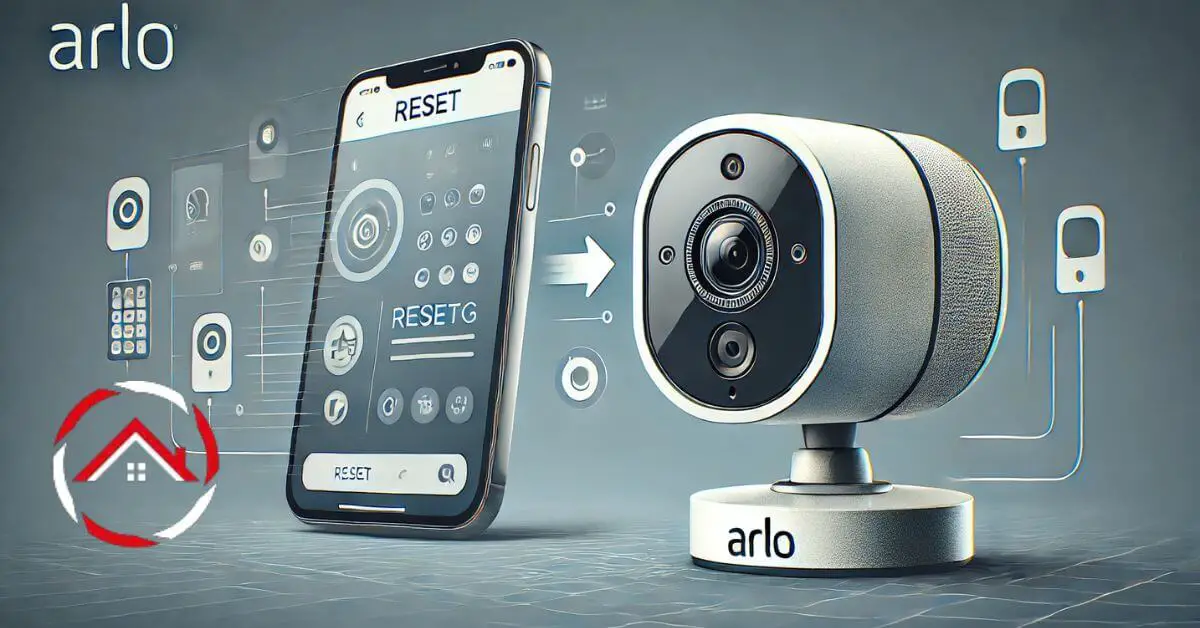
Resetting your Arlo camera can solve many issues and restore its performance. Whether you’re dealing with connectivity problems or want to start fresh, the reset process is straightforward.
First, locate the reset button on your camera. Press and hold it for a few seconds. You’ll see the camera light flash, indicating a reset.
After this, reconnect it to your Wi-Fi. Remember, resetting your Arlo camera will erase all settings, so be prepared to set it up again.
Follow these steps to get your camera working like new. Let’s dive in and ensure your home security is back on track!
Table of Contents
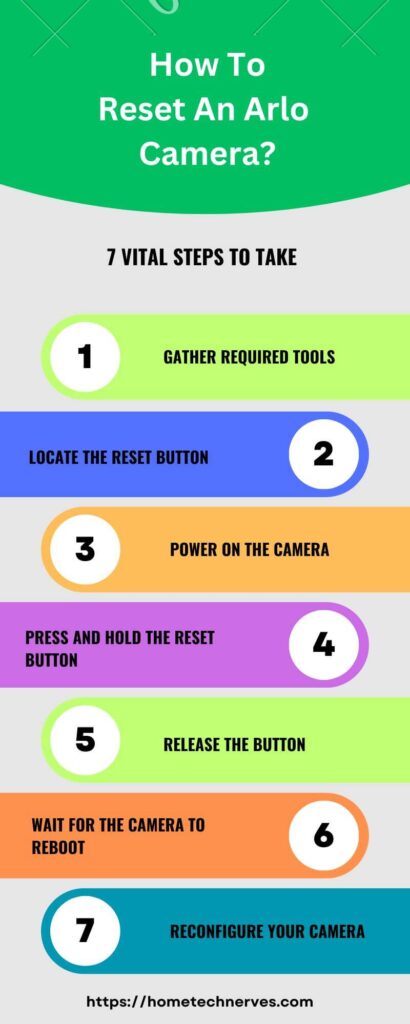
How To Reset An Arlo Camera?
Resetting your Arlo camera can quickly resolve connectivity issues or other glitches. Follow these simple steps to ensure your device is back to optimal performance.
- Locate the Reset Button: Find the reset button on the back or bottom of your Arlo camera. It’s usually small and may require a pin to press.
- Press and Hold the Button: Use a paperclip or a similar tool to press and hold the reset button. Maintain pressure for about 10 seconds.
- Watch for Flashing Lights: After holding the button, look for the camera light to flash amber. This indicates that the reset process is in motion.
- Release the Button: Once you see the amber light, release the reset button. Your camera will reboot automatically.
- Reconnect to Wi-Fi: Open the Arlo app and select “Add Device.” Follow the prompts to reconnect your camera to your Wi-Fi network.
- Reconfigure Camera Settings: After reconnecting, adjust your camera settings as needed. This includes motion detection and notifications.
- Test the Camera: Once you’ve set everything up, test the camera to ensure it’s functioning correctly. Check live views and motion alerts.
By following these steps, your Arlo camera will be reset and ready for use!
How To Reset Arlo Essential Camera?
Resetting your Arlo Essential Camera is a quick and effective way to troubleshoot issues and restore its functionality. Whether you’re facing connectivity problems or want to start fresh, this guide will help you reset your camera in no time.
- Locate the Reset Button: The reset button is typically found on the bottom of the camera. You may need a pin or a paperclip to access it.
- Press and Hold the Button: Firmly press and hold the reset button for about 15 seconds. This duration ensures the reset process initiates properly.
- Observe the Camera Lights: Watch for the LED light to change from blue to amber. This change indicates that the reset is underway.
- Release the Button: Once the LED turns amber, release the reset button. The camera will automatically restart.
- Reconnect to Wi-Fi: Open the Arlo app and select “Add Device.” Follow the prompts to reconnect your Arlo Essential Camera to your home Wi-Fi network.
- Reconfigure Your Settings: After reconnecting, access your camera settings to customize features like motion detection and alerts. Adjust these settings to suit your needs.
- Test Your Camera: Finally, test your camera by checking the live feed. Ensure it’s working properly and that you receive motion alerts as expected.
With these steps, your Arlo Essential Camera will be reset and ready for reliable home security once again!
How To Reset Arlo Camera Offline?
If your Arlo camera is offline, resetting it can often resolve connectivity issues and restore its functionality.
This guide will walk you through the process step-by-step, ensuring your camera is back online in no time.
- Find the Reset Button: Look for the reset button, usually located on the back or bottom of your Arlo camera. A paperclip or similar tool might be required to press it.
- Press and Hold the Reset Button: Firmly press and hold the reset button for about 10 seconds. This action initiates the reset process.
- Watch for Light Changes: Observe the camera’s LED light. A flashing amber light indicates that the reset is in progress.
- Release the Reset Button: When the LED light turns solid amber, release the button. The camera will reboot automatically after this.
- Reconnect the Camera to Wi-Fi: Open the Arlo app and select “Add Device.” Follow the instructions to reconnect your camera to your Wi-Fi network.
- Reconfigure Your Camera Settings: After reconnecting, access the settings in the app to adjust features such as motion detection and alerts as per your preferences.
- Verify Camera Functionality: Finally, check the live feed on the app to ensure your Arlo camera is functioning properly and is connected to the internet.
By following these steps, you can successfully reset your Arlo camera and get it back online for effective home security!
How To Reset Arlo Pro 4 Camera?
Resetting your Arlo Pro 4 camera can help resolve common issues and restore its connectivity. Whether you’re troubleshooting problems or want to start anew, this simple guide will walk you through the reset process step-by-step.
- Locate the Reset Button: Find the reset button on the back of your Arlo Pro 4 camera. You might need a small tool like a paperclip to access it.
- Press and Hold the Button: Firmly press and hold the reset button for about 10 seconds. This action triggers the reset sequence.
- Monitor the LED Light: Keep an eye on the camera’s LED light. A flashing amber light means the reset is in progress.
- Release the Reset Button: Once the LED light changes to solid amber, release the reset button. The camera will automatically restart itself.
- Reconnect to Wi-Fi: Open the Arlo app and select “Add Device.” Follow the prompts to reconnect your Arlo Pro 4 camera to your Wi-Fi network.
- Adjust Your Camera Settings: After reconnecting, access the camera settings in the app to customize features like motion detection and notifications according to your needs.
- Test the Camera Functionality: Finally, check the live feed on the app to ensure your Arlo Pro 4 camera is functioning correctly and is fully connected to the internet.
By following these steps, you can easily reset your Arlo Pro 4 camera and ensure it’s ready for reliable home security!
How To Reset Arlo Pro 2 Camera?
If you’re experiencing issues with your Arlo Pro 2 camera, resetting it can help restore functionality and connectivity.
This straightforward guide will provide you with the necessary steps to reset your camera effectively.
- Identify the Reset Button: The reset button is located on the back of your Arlo Pro 2 camera. You’ll need a small tool like a paperclip to press it.
- Press and Hold the Reset Button: Firmly press and hold the reset button for about 10 seconds. This action will initiate the reset process.
- Watch for LED Light Changes: Keep an eye on the camera’s LED light. A flashing amber light indicates that the reset is in progress.
- Release the Reset Button: Once the LED light turns solid amber, release the reset button. Your camera will now automatically reboot.
- Reconnect the Camera to Wi-Fi: Open the Arlo app and select “Add Device.” Follow the on-screen instructions to reconnect your Arlo Pro 2 camera to your Wi-Fi network.
- Reconfigure Your Camera Settings: After reconnecting, access the settings in the app to customize features like motion detection and alerts to your preference.
- Test the Camera: Finally, check the live feed in the app to confirm that your Arlo Pro 2 camera is functioning properly and connected to the internet.
By following these steps, you can easily reset your Arlo Pro 2 camera and get it back to providing reliable home security!
How To Factory Reset Arlo Ultra 2 Camera?
If your Arlo Ultra 2 camera is not functioning correctly or you want to erase all settings, performing a factory reset is the solution.
This guide will help you reset your camera to its original settings in just a few simple steps.
- Locate the Reset Button: The reset button is found on the back of the Arlo Ultra 2 camera. You may need a paperclip or a similar tool to press it.
- Press and Hold the Reset Button: Firmly press and hold the reset button for about 15 seconds. This will start the factory reset process.
- Observe the LED Light: Keep an eye on the LED light. When it flashes amber, this indicates that the reset process has begun.
- Release the Reset Button: After the LED light turns solid amber, release the reset button. The camera will automatically reboot itself.
- Reconnect the Camera to Wi-Fi: Open the Arlo app and select “Add Device.” Follow the instructions to reconnect your Arlo Ultra 2 camera to your Wi-Fi network.
- Reconfigure Your Camera Settings: Once reconnected, access the settings in the app to set up features like motion detection and notifications according to your preferences.
- Test the Camera Functionality: Finally, check the live feed in the app to ensure your Arlo Ultra 2 camera is functioning properly and connected to the internet.
By following these steps, you can successfully factory reset your Arlo Ultra 2 camera and restore its original functionality!
How To Reset Arlo Pro 3 Camera?
Resetting your Arlo Pro 3 camera can resolve connectivity issues and restore its performance.
Whether you’re troubleshooting problems or need to reconfigure your settings, this guide provides a straightforward process for resetting your camera.
- Find the Reset Button: The reset button is located on the back of your Arlo Pro 3 camera. You might need a small tool like a paperclip to access it.
- Press and Hold the Reset Button: Firmly press and hold the reset button for approximately 10 seconds. This will initiate the reset process for your camera.
- Monitor the LED Light: Observe the camera’s LED light closely. A flashing amber light indicates that the reset is currently in progress.
- Release the Reset Button: Once the LED light turns solid amber, release the reset button. Your camera will now automatically reboot.
- Reconnect the Camera to Wi-Fi: Open the Arlo app and select “Add Device.” Follow the on-screen prompts to reconnect your Arlo Pro 3 camera to your home Wi-Fi network.
- Reconfigure Camera Settings: After successfully reconnecting, access the settings in the app to adjust features like motion detection and alerts to fit your preferences.
- Test the Camera Functionality: Finally, check the live feed in the app to ensure your Arlo Pro 3 camera is working correctly and connected to the internet.
By following these simple steps, you can effectively reset your Arlo Pro 3 camera and ensure it’s ready for reliable home security!
How To Reset Camera Arlo KB?
Resetting your Arlo camera is essential for resolving connectivity issues and ensuring optimal performance.
If you’re looking to restore your camera to factory settings, this guide will walk you through the process step-by-step.
- Identify the Reset Button: The reset button is usually located on the back or bottom of your Arlo camera. A small tool, like a paperclip, may be needed to press it.
- Press and Hold the Reset Button: Firmly press and hold the reset button for about 10-15 seconds. This action will initiate the reset process for your camera.
- Watch for LED Light Changes: Keep an eye on the camera’s LED light. A flashing amber light indicates that the reset is taking place.
- Release the Reset Button: Once the LED light turns solid amber, you can release the reset button. The camera will now reboot automatically.
- Reconnect the Camera to Wi-Fi: Open the Arlo app on your device and select “Add Device.” Follow the on-screen instructions to reconnect your Arlo camera to your Wi-Fi network.
- Reconfigure Your Camera Settings: After reconnecting, access the settings in the app to customize features such as motion detection and notifications to suit your needs.
- Test Your Camera’s Functionality: Finally, check the live feed in the app to ensure that your Arlo camera is functioning properly and connected to the internet.
By following these steps, you can easily reset your Arlo camera and ensure it’s ready for reliable home security!
Wrap Up
In conclusion, resetting your Arlo camera is a simple yet effective way to resolve connectivity issues and restore functionality.
By following the steps outlined, you can quickly reset your device and get it back online. Remember to locate the reset button, hold it for the required time, and reconnect your camera to Wi-Fi.
Once you’ve set everything up, take a moment to test the live feed. You’ll have peace of mind knowing your camera is working correctly.
So, don’t hesitate to reset your Arlo camera whenever needed. It’s an easy fix that ensures your home security remains intact!
Frequently Asked Questions
How do I reset my Arlo camera?
To reset your Arlo camera, locate the reset button, usually on the back or bottom. Press and hold it for about 10 seconds until the LED light blinks amber, then release. Your camera will reboot, restoring it to factory settings.
What should I do if my Arlo camera won’t reset?
If your Arlo camera won’t reset, ensure it’s powered on and connected to Wi-Fi. Try holding the reset button longer, up to 20 seconds. If it still fails, check for firmware updates or consult Arlo support for further troubleshooting.
Will resetting my Arlo camera delete my settings?
Yes, resetting your Arlo camera will erase all custom settings, including Wi-Fi connections, modes, and rules. After the reset, you’ll need to set up the camera again using the Arlo app, reconfiguring all preferences as desired.
How do I reconnect my Arlo camera after resetting?
To reconnect your Arlo camera after resetting, open the Arlo app and select “Add Device.” Follow the prompts to connect to your Wi-Fi network and re-add the camera. Ensure your camera is close to the router during setup for best results.
Reference:
kb.arlo.com. How do I factory reset my Arlo Essential Indoor Camera?