Hey there! Connecting your Vivint camera to WiFi is a breeze, and I’m here to guide you through it.
As someone who has set up multiple Vivint cameras myself, I understand the importance of a smooth process.
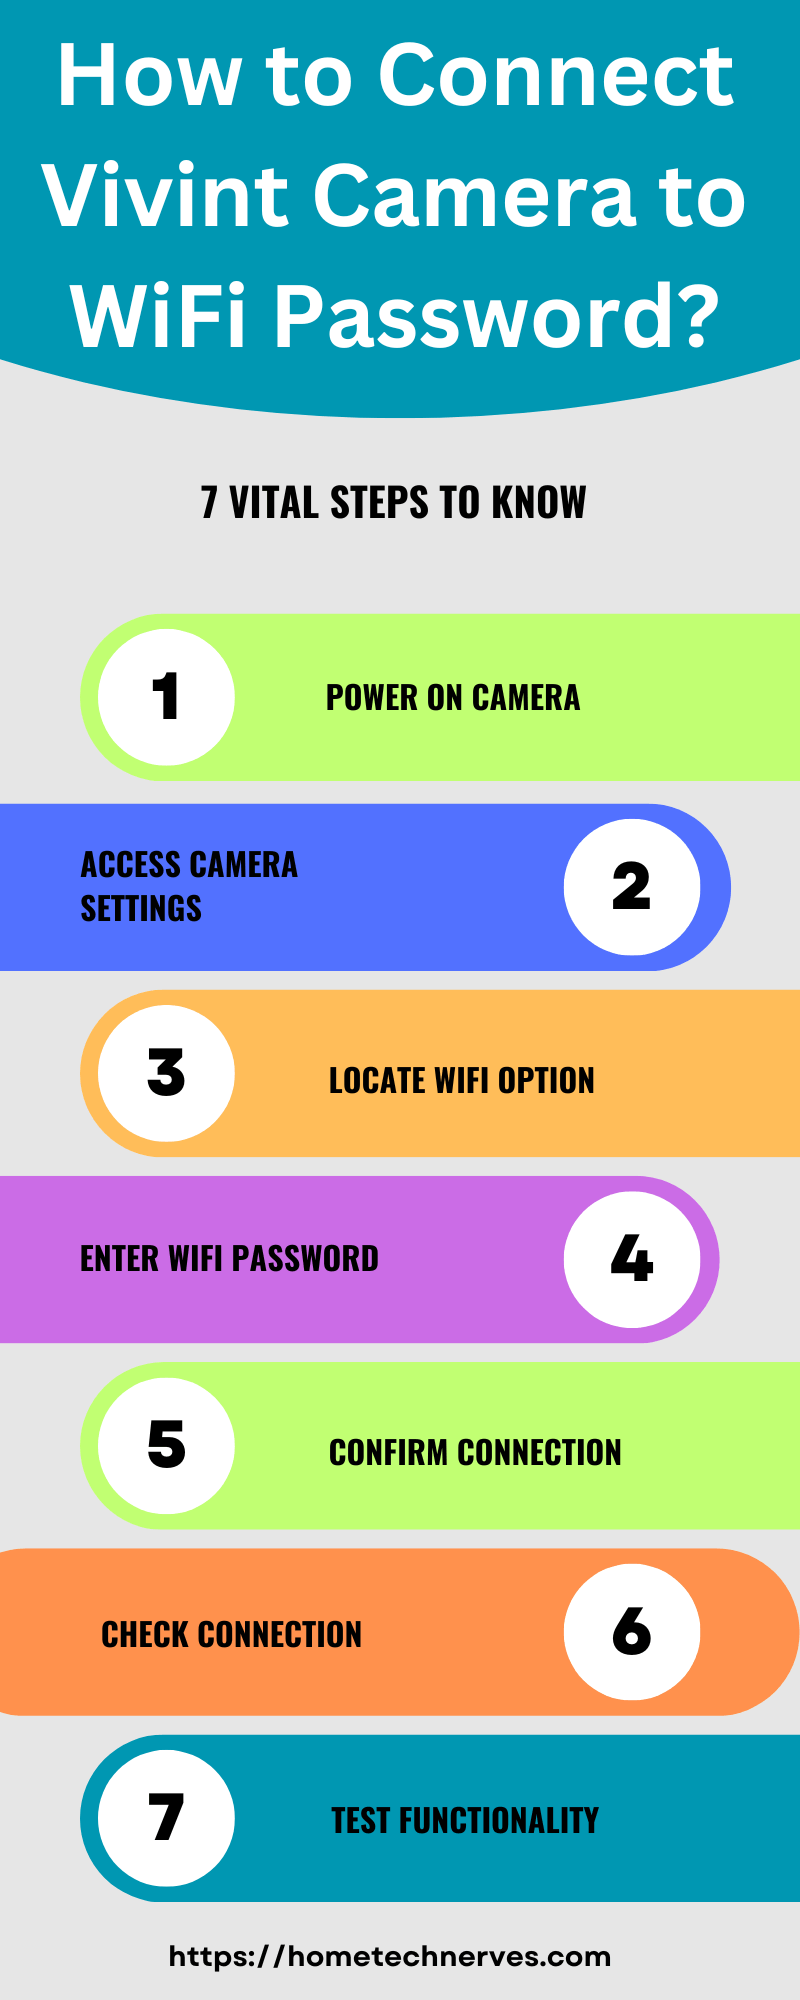
First, power up your camera and ensure your WiFi is up and running. Open the Vivint app, navigate to the camera settings, and select “Connect to WiFi.”
Follow the on-screen instructions, entering your WiFi credentials when prompted. Once done, your camera will seamlessly integrate into your home network.
Trust me, it’s as straightforward as it gets. Let’s explore the query “How to connect Vivint camera to WiFi?” and get your Vivint camera online effortlessly!
Read more: Home Security Cameras Without Wifi
Table of Contents
Does the Vivint System Work Without WiFi?
Vivint systems primarily rely on WiFi for communication and remote access. While some components may function locally without WiFi, essential features like remote monitoring, notifications, and app control require a stable internet connection.
Additionally, a continuous WiFi connection ensures timely updates and enhances the overall performance of your Vivint system.
To maximize the capabilities of Vivint’s smart home technology, maintaining a reliable WiFi connection is recommended.
However, specific functionalities may still operate locally in the event of a temporary WiFi disruption, ensuring basic security measures are in place.

How to Connect Vivint Camera to WiFi Password?
Ensuring your Vivint camera is seamlessly connected to your WiFi is crucial for efficient monitoring. Follow these steps to establish a secure and reliable connection, enhancing the functionality of your Vivint camera.
1. Power Up Your Vivint Camera:
Start by providing power to your Vivint camera. Plug it into a power source using the included adapter and ensure the device is properly turned on.
2. Access the Vivint App:
Download and open the Vivint app on your smartphone or tablet. Log in to your Vivint account using your credentials to gain access to the camera settings.
3. Navigate to Camera Settings:
Within the Vivint app, locate the camera settings menu. This can usually be found in the device management section or a designated area for camera configurations.
4. Select “Connect to WiFi”:
Look for the option that allows you to connect your Vivint camera to WiFi. This might be labeled as “Connect to WiFi” or a similar phrase indicating the wireless setup process.
5. Input WiFi Credentials:
Follow the on-screen instructions to input your WiFi network’s credentials (SSID and password). Ensure accuracy to establish a secure connection. Once entered, the Vivint camera will connect to your WiFi, enabling remote access and enhanced functionality.
By carefully following these steps, you’ll have your Vivint camera securely connected to your WiFi, providing you with optimal monitoring capabilities.
How Do I Fix My Vivint Camera Offline?
Encountering the issue of your Vivint camera being offline can be frustrating, but fear not! Follow these simple steps to troubleshoot and bring your Vivint camera back online for uninterrupted surveillance.
Steps:
- Check Power Connection: Ensure that your Vivint camera is adequately powered by confirming its connection to a reliable power source. A loose or disconnected power supply may lead to offline status.
- Verify Internet Connection: Confirm that your home WiFi network is functioning correctly. A stable internet connection is essential for your Vivint camera to stay online. Restart your router if necessary.
- Reboot the Vivint Camera: Sometimes, a simple reboot can resolve connectivity issues. Power off your Vivint camera, wait a few seconds, and then power it back on. This can refresh the device’s connection to the network.
- Inspect Camera Placement: Check if the camera is within the WiFi signal range. Obstructions or interference can lead to connectivity problems. Relocating the camera to a more optimal position may improve its online status.
- Update Vivint App and Firmware: Ensure your Vivint app is up to date and check for any available firmware updates for your camera. Outdated software can contribute to offline status, and updating may resolve compatibility issues.
How to Fix Vivint Panel Won’t Connect to WiFi?
Experiencing difficulty with your Vivint panel connecting to WiFi? Don’t worry, troubleshooting the issue can be straightforward. Follow these steps to resolve the problem and ensure a seamless connection.
Steps:
- Check WiFi Credentials: Verify that the WiFi credentials (SSID and password) entered into the Vivint panel are accurate. Typos or errors can hinder the connection.
- Reboot Vivint Panel: Power off the Vivint panel, wait a few seconds, and then power it back on. A simple reboot can refresh the device’s network connection and resolve connectivity issues.
- Inspect WiFi Signal Strength: Ensure the Vivint panel is within the range of a stable WiFi signal. Weak signals or interference can disrupt connectivity. Consider relocating the panel for a stronger connection.
- Update Vivint Panel Software: Check for any available software updates for the Vivint panel. Outdated software may have compatibility issues with WiFi networks. Install the latest updates for optimal performance.
- Contact Vivint Support: If issues persist, reach out to Vivint’s customer support. Their team can provide tailored assistance, troubleshoot specific issues, and guide you through any necessary steps to resolve the problem.
How to Connect Vivint Outdoor Camera?
Setting up your Vivint Outdoor Camera is a quick and straightforward process. Ensure your property is secure and your surveillance is optimized by following these simple steps to connect your Vivint Outdoor Camera.
Steps:
- Power Up the Camera: Plug your Vivint Outdoor Camera into a power source using the provided adapter. Ensure the camera is turned on and ready for setup.
- Access Vivint App: Download and open the Vivint app on your smartphone or tablet. Log in to your Vivint account to access the camera setup options.
- Navigate to Camera Settings: Within the Vivint app, locate the camera settings menu. This may be under device management or a specific section for camera configurations.
- Select “Add a Device”: Look for the option to add a new device within the camera settings. Choose “Add a Device” or a similar prompt to initiate the camera connection process.
- Follow On-Screen Instructions: Adhere to the on-screen instructions in the Vivint app to complete the camera connection. This usually involves selecting your WiFi network, entering credentials, and confirming the setup.
By following these steps, you’ll have your Vivint Outdoor Camera seamlessly connected, providing enhanced home security and peace of mind.
How to Fix Vivint Camera Not Working On App?
Encountering issues with your Vivint camera not working on the app can be frustrating, but troubleshooting is here to help. Follow these simple steps to address and resolve any problems you may be experiencing, ensuring seamless access to your camera feed through the Vivint app.
Steps:
- Check Internet Connection: Ensure your smartphone or tablet has a stable internet connection. A weak or intermittent connection can hinder the camera feed on the Vivint app.
- Restart the Vivint App: Close the Vivint app completely and reopen it. This can help refresh the app and resolve any temporary glitches affecting the camera’s functionality.
- Verify Camera Power: Ensure your Vivint camera is powered on and connected to a reliable power source. A loss of power can result in the camera not transmitting its feed to the app.
- Update Vivint App: Check for updates for the Vivint app in your device’s app store. Outdated versions may have compatibility issues; updating to the latest version can address these issues.
- Contact Vivint Support: If the problem persists, reach out to Vivint’s customer support. Their team can provide specific guidance, troubleshoot issues, and ensure your Vivint camera is working seamlessly with the app.
How to Reset Vivint Outdoor Camera?
Resetting your Vivint Outdoor Camera can be necessary for troubleshooting or reconfiguration. Follow these simple steps to reset your camera and ensure a smooth and effective process.
Steps:
- Locate the Camera Reset Button: Find the reset button on your Vivint Outdoor Camera. This button is typically small and may be recessed to avoid accidental resets.
- Press and Hold the Reset Button: Using a pointed object like a paperclip, press and hold the reset button on the camera for about 10 seconds. This action initiates the reset process.
- Observe LED Indicators: Pay attention to any LED indicators on the camera. These may flash or change color during the reset process, signaling that the camera is reverting to its default settings.
- Reconnect to Power: After resetting, reconnect the camera to a power source. This step is crucial to powering up the camera again and allowing it to be reconfigured.
- Reconfigure in Vivint App: Open the Vivint app, navigate to camera settings, and follow the on-screen instructions to reconfigure the camera. Input your WiFi credentials and complete the setup process for the reset camera.
By following these steps, you can successfully reset your Vivint Outdoor Camera and address any issues you may be encountering.
Wrap Up
Connecting your Vivint camera to WiFi is a straightforward process that ensures your home stays secure.
Having personally navigated through this setup multiple times, I can attest to its simplicity.
Remember to power up the camera, access the Vivint app, and follow the intuitive steps to connect to your WiFi.
It’s a quick task that enhances the functionality of your Vivint camera, allowing you to monitor your space with ease.
Trust me, with a stable connection, you’ll experience the full benefits of Vivint’s smart home security. Stay connected, stay secure.
Frequently Asked Questions
How do I connect my Vivint camera to WiFi?
To connect your Vivint camera to WiFi, open the Vivint app, select your camera, and follow the prompts. Enter your WiFi credentials when prompted. The camera may scan a QR code to complete the connection process.
What should I do if my Vivint camera won’t connect to WiFi?
If your Vivint camera won’t connect, ensure your WiFi network is working by testing another device. Restart your router and camera. If the issue persists, try resetting the camera and reconnecting it using the Vivint app.
Can I use WPS to connect my Vivint camera to WiFi?
Yes, you can use WPS to connect your Vivint camera. Press the WPS button on your router and the camera simultaneously. The devices should pair automatically, allowing the camera to connect to the WiFi network.
How do I change the WiFi network for my Vivint camera?
To change the WiFi network, access the Vivint app, navigate to the camera settings, and select WiFi settings. Choose your new network and enter the password. The camera will then connect to the new WiFi network.
References:
Vivint.com. Go!Control – Add Camera. https://support.vivint.com/article/Go-Control-Online-Access-Add-Camera


