

Installing a home security system might seem challenging, but it’s easier than you think! With a few tools and some guidance, you can secure your home in no time.
This step-by-step guide will walk you through the entire process—from planning and setting up sensors to installing cameras and testing the system.
A well-installed security system not only protects your home but also gives you peace of mind.
So, let’s dive in on how to install a home security system, and get your home safeguarded with a reliable system. Ready to start? Follow along and turn your house into a safer place today!
Table of Contents
How to Install a Home Security System? A Detailed Guide
Installing a home security system enhances the safety of your property and loved ones.
This guide walks you through easy steps to set up your system, ensuring comprehensive protection.
Whether you choose a wired or wireless setup, you can secure your home with confidence.
1. Planning and Preparation
Before you begin installing your home security system, it’s crucial to spend time planning and preparing.
This step ensures you have the right equipment and understand where everything will go.
Let’s break down the preparation process into clear, actionable steps.
Assess Your Security Needs
- Identify Vulnerable Areas: Walk around your home and note potential weak points, such as doors, windows, and the garage.
- Determine the Number of Components: Count the doors and windows that need sensors. Also, decide how many cameras you want to monitor different areas.
- Consider Additional Protection: Think about other entry points like basements or sliding doors that may require extra sensors.
Choose the Right System
- Compare Features: Evaluate different systems based on your needs. Look for features like motion detectors, smart locks, and camera resolution.
- Decide on Smart Home Integration: Consider whether you want your security system to connect with other smart home devices like lights, doorbells, or voice assistants.
- Review Connectivity Options: Decide between wired and wireless systems based on your home’s layout and personal preference.
Gather Necessary Tools
- Basic Tools Required: Ensure you have tools like screwdrivers, a drill, a ladder, and a level handy for installation.
- Safety Gear: Use gloves and goggles, especially when drilling or handling wires, to protect yourself from potential hazards.
Read the Manual
- Go Through the Instructions: Take the time to read the manufacturer’s instructions thoroughly. This helps you understand how each component works and prevents mistakes.
- Check Online Resources: Look for video tutorials or additional guides provided by the manufacturer for more clarity.
2. Setting Up the Control Panel
The control panel is the heart of your home security system. Setting it up correctly ensures smooth operation and easy access to all system controls.
Choose a Central Location
- Place for Easy Access: Position the control panel near the main entrance or a high-traffic area for convenient access.
- Avoid Obstacles: Ensure the panel is not obstructed by walls or furniture, and avoid placing it in areas prone to moisture or extreme temperatures.
Power and Connection
- Connect to a Power Source: Plug the control panel into a power outlet. If it’s a wireless system, ensure the batteries are installed correctly.
- Connect to the Internet: If your system requires internet connectivity, use an Ethernet cable or connect via Wi-Fi as instructed.
Test the Panel
- Initial Functionality Check: Power on the control panel and ensure all lights and buttons are working.
- Configure Basic Settings: Set up basic system preferences, such as language and time zone, before moving on to installing other components.
3. Installing Door and Window Sensors
Door and window sensors are essential for detecting unauthorized entry points in your home.
Proper placement and testing of these sensors ensure that your home is secure and alerts are triggered as expected.
Placement and Positioning
- Choose Optimal Locations: Install sensors on all accessible doors and windows, especially on the ground floor and basement levels.
- Attach Sensors Securely: Use adhesive strips or screws to firmly attach the sensors on the frames of doors and windows. Place the main sensor unit on the stationary part (e.g., the door or window frame) and the smaller magnet on the moving part (e.g., the door or window itself).
- Height and Visibility Considerations: Position sensors at a height that’s not easily reachable but still visible for easy maintenance.
Align Sensor and Magnet
- Proper Alignment: Make sure the sensor and magnet are correctly aligned. They should be close enough (usually within 0.5 inches) to ensure the sensor detects when the door or window is opened or closed.
- Test the Alignment: Move the door or window slightly to see if the sensor responds correctly. If misaligned, adjust the placement to avoid false alarms or malfunction.
Test the Sensors
- Initial Functionality Test: Open and close each door and window where sensors are installed to confirm they trigger alerts as expected.
- Check the Control Panel: Verify that the control panel registers the activity of each sensor. If a sensor is not functioning, recheck the alignment and connection.
- Run Multiple Tests: Perform several tests to ensure reliability and minimize the chances of false alarms or missed triggers.
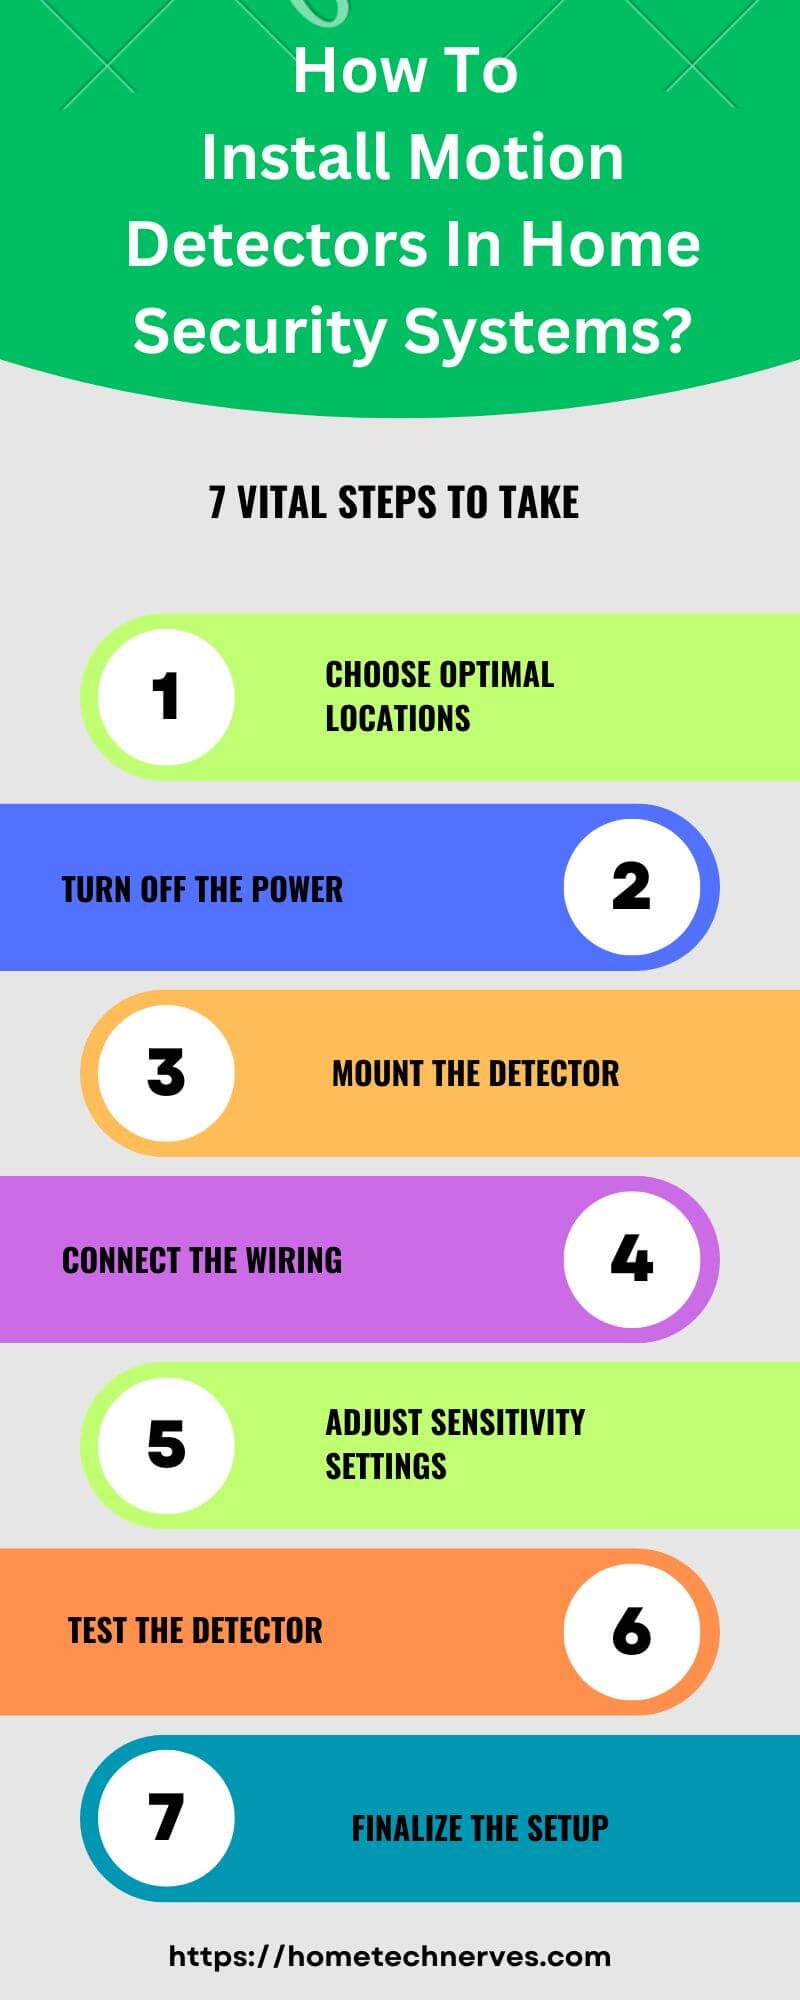
4. Installing Motion Detectors
Motion detectors play a crucial role in your home security system by alerting you to movement in designated areas.
Proper installation and configuration will enhance their effectiveness and reduce false alarms.
Identify Optimal Locations
- Placement Strategy: Install motion detectors in the corners of rooms for maximum coverage. This positioning allows the detector to monitor a larger area without obstruction.
- Avoid Direct Sunlight: Ensure detectors are facing away from windows to prevent sunlight from triggering false alarms. Direct sunlight can cause fluctuations in temperature that may confuse the sensor.
- Consider High-Traffic Areas: Place detectors in areas with frequent foot traffic, such as hallways or entryways, to capture movement effectively.
Mount the Motion Detector
- Use the Right Tools: Secure the motion detector using screws or adhesive strips provided in the installation kit. Choose screws for a more permanent solution, especially in high-traffic areas.
- Check for Stability: Ensure the detector is mounted firmly to avoid it being knocked loose by vibrations or movement in the room.
- Height Considerations: Typically, mounting the detector 6-8 feet off the ground is ideal for optimal detection.
Adjust Sensitivity and Settings
- Set Sensitivity Levels: Adjust the sensitivity settings according to the room’s usage. For rooms with pets, consider lowering sensitivity to avoid false alarms caused by small animals.
- Configure Detection Zones: Some detectors allow you to customize detection zones. Adjust these zones to focus on areas where you want movement detected while ignoring less critical spaces.
- Conduct Sensitivity Tests: After adjusting settings, perform tests by walking through the detection area to ensure the detector responds appropriately without triggering unnecessary alarms.
5. Setting Up Security Cameras
Security cameras are vital for monitoring your home and deterring potential intruders.
Proper installation and positioning will maximize their effectiveness and ensure you capture clear footage when it matters most.
Choose Camera Locations
- Cover Key Entry Points: Install cameras at all main entry points, including front and back doors, as well as garage entrances. This ensures you capture any activity around these vulnerable areas.
- Monitor Large Common Areas: Place cameras in large rooms or common areas, such as living rooms or hallways, to keep an eye on high-traffic spaces.
- Identify Blind Spots: Walk around your property and identify areas that are not easily visible, such as behind shrubs or fences. Position cameras to eliminate these blind spots for comprehensive coverage.
Mounting the Cameras
- Use Proper Mounting Equipment: Install cameras using the brackets or screws included in the package. Make sure they are securely attached to prevent movement or tampering.
- Position for a Wide Field of View: Angle the cameras to cover the maximum area possible. A slightly downward angle often captures more detail and helps reduce obstructions.
- Test Viewing Angles: After mounting, check the camera’s view by accessing the live feed. Adjust the angle as needed to ensure it captures the desired area effectively.
Wiring and Connectivity
- For Wired Cameras: Run cables discreetly along walls, ceilings, or floors to keep them out of sight and protect them from damage. Use cable conduits if necessary for a clean look.
- Ensure Proper Power Supply: Make sure wired cameras are connected to a power source and test the connection to ensure they function correctly.
- Connect Wireless Cameras: For wireless cameras, connect them to your Wi-Fi network as per the manufacturer’s instructions.
- Test the Video Feed: Check the live video feed on your control panel or mobile app to ensure the camera is functioning properly and the video quality meets your expectations. Adjust positioning if necessary for clearer footage.
Read more: Top Home Security Cameras
6. Installing Additional Components
To enhance your home security system further, consider adding additional components like smoke detectors, carbon monoxide detectors, smart doorbells, and smart locks. These devices provide extra layers of safety and convenience.
Smoke and Carbon Monoxide Detectors
- Optimal Placement: Install smoke detectors in key areas, such as the kitchen, bedrooms, and hallways. This ensures early detection of smoke or carbon monoxide.
- Follow Safety Guidelines: Place smoke detectors at least 10 feet away from cooking appliances to reduce false alarms. For carbon monoxide detectors, install them on each level of your home, particularly near sleeping areas.
- Regular Maintenance: Test detectors monthly and replace batteries as needed. Consider units with interconnectivity so that when one alarm sounds, they all do.
Smart Doorbell
- Choose the Right Location: Install the smart doorbell at your front door, ensuring it has a clear view of the entryway and the surrounding area.
- Height Considerations: Mount the doorbell at about 4-5 feet off the ground to capture facial details of visitors effectively.
- Test Functionality: After installation, test the video and audio quality through your mobile app. Ensure notifications are set up to alert you when someone approaches.
Smart Locks
- Replacing Existing Locks: Remove your current door locks and replace them with smart locks. Follow the manufacturer’s instructions for proper installation.
- Connect to Your Security System: If your smart lock integrates with your existing security system, follow the steps to connect it for centralized control. This may involve downloading a specific app or syncing with the control panel.
- Test Access Features: After installation, test the lock by using both the app and physical keys (if applicable) to ensure it functions correctly. Check features like remote locking, unlocking, and any security alerts that may trigger when the lock is accessed.
7. Configuring the System and Final Testing
Once you’ve installed all components of your home security system, it’s time to configure settings and perform final tests. This ensures everything is working smoothly and tailored to your needs.
Set Up Zones and Notifications
- Configure Different Zones: In your control panel, set up distinct zones for various areas of your home, such as the front door, backyard, and garage. This allows for better monitoring and customization of alerts.
- Define Activity Types: Specify which types of activities trigger notifications for each zone. For instance, you may want alerts for motion detected in the backyard but not for regular activity in the living room.
- Set Notification Preferences: Choose how you want to be alerted for events. Set up mobile alerts for immediate notifications, and consider email notifications for summaries or less urgent alerts. Make sure to provide your contact details for emergency alerts.
Run a Full System Test
- Test Each Component Individually: Begin by checking each sensor, camera, and detector to ensure they are functioning correctly. Open and close doors and windows to verify sensor responses, and walk through the areas monitored by motion detectors.
- Check Camera Feeds: Access the video feeds from all cameras to ensure they are capturing the right areas and that the quality is satisfactory.
- Test the Control Panel: Use the control panel to arm and disarm the system. Verify that it responds promptly to commands and displays the correct status for each zone.
Check for Malfunctions or Weak Signals
- Inspect for Weak Signals: Walk around your home with a mobile device connected to the security system. Check for any areas where the signal is weak or cameras do not function as expected.
- Address Any Issues: If you notice any malfunctions or weak signals, troubleshoot by repositioning devices, adjusting settings, or consulting the user manual for solutions.
- Final Review: Conduct a comprehensive review of the entire system. Make sure all features work as intended, and familiarize yourself with the app or control panel’s interface for daily operations.
8. Connecting to a Monitoring Service (Optional)
Enhancing your home security system with a monitoring service can provide an extra layer of protection.
Whether you choose self-monitoring or professional monitoring, ensure you set it up correctly for optimal safety.
Choose a Monitoring Plan
- Self-Monitoring: This option allows you to monitor alerts through a mobile app or control panel. You will receive notifications directly and respond to incidents as they occur. This option is often more cost-effective but requires you to be vigilant.
- Professional Monitoring: With this plan, a third-party service monitors your security system 24/7. If an alarm is triggered, they will contact emergency services on your behalf. This option typically incurs a monthly fee but offers peace of mind, especially when you’re away from home.
- Evaluate Your Needs: Consider your lifestyle and the level of security you want. Some systems may offer hybrid options, allowing you to start with self-monitoring and switch to professional monitoring as needed.
Set Up Emergency Contacts
- Provide Essential Details: Enter emergency contact information into your system. This includes local emergency services, family members, or trusted friends who can respond quickly if needed.
- Prioritize Contacts: List contacts in order of priority, ensuring that the most reliable and available individuals are alerted first in case of an emergency.
- Keep Information Updated: Regularly check and update contact information to ensure it remains current, especially if there are changes in your household or emergency contacts.
Test Monitoring Service
- Trigger Alarms: Conduct tests by intentionally triggering the alarms to ensure that the monitoring service receives alerts. This could involve opening a window or door with sensors or activating a motion detector.
- Check Response Times: Confirm that the monitoring service contacts you and emergency responders in a timely manner after an alarm is triggered.
- Review Communication: Make sure the monitoring service knows how to reach you, and clarify any specific instructions for handling alarms (e.g., false alarms or confirming your identity).
- Conduct Regular Tests: Schedule routine tests every few months to verify that the system and monitoring service are functioning correctly and to refresh your familiarity with the process.
9. Regular Maintenance and Upkeep
To ensure your home security system remains effective and reliable, regular maintenance is essential.
By incorporating routine checks and updates, you can safeguard your home against potential threats and ensure all components work seamlessly.
Routine System Checks
- Monthly Testing: Make it a habit to test all sensors, cameras, and other components of your security system every month. This includes opening doors and windows to check sensor functionality and walking through motion detector areas.
- Check Control Panel Functionality: Review the control panel to ensure it responds correctly to commands, including arming, disarming, and alerting you to any issues.
- Review Notification Settings: Confirm that you are still receiving alerts as intended and that your contact information is current.
Update Software and Firmware
- Regular Updates: Check for software and firmware updates for your security system regularly. Many manufacturers release updates to improve functionality and patch security vulnerabilities.
- Follow Manufacturer Instructions: Update your system as per the manufacturer’s guidelines, ensuring all components are compatible and working optimally.
- Enable Automatic Updates: If available, enable automatic updates to keep your system current without needing manual intervention.
Clean Cameras and Detectors
- Wipe Camera Lenses: Regularly clean the lenses of your security cameras with a soft, dry cloth to remove dust and smudges. Clear lenses ensure the best video quality and clarity.
- Dust Detectors: Periodically dust off smoke and carbon monoxide detectors to keep them free of debris. This helps ensure they operate efficiently and do not malfunction due to dust accumulation.
- Check for Obstructions: Inspect the areas around cameras and detectors to ensure nothing obstructs their view or functionality, such as plants or furniture.
By following these regular maintenance tips, you can keep your home security system in top shape, ensuring it provides reliable protection for your home and loved ones.
Professional Vs DIY Installation
When it comes to setting up systems for your home, choosing between professional installation and a do-it-yourself (DIY) approach can significantly impact the outcome.
Understanding the advantages and disadvantages of each method is essential for making an informed decision that aligns with your skills, budget, and specific needs.
Professional Installation
Pros:
- Expertise and Experience: Professional installers have the knowledge and experience to handle complex setups, ensuring your system is installed correctly and functions optimally.
- Time-Saving: Hiring professionals saves you time and effort, allowing you to focus on other important tasks or enjoy your newly installed system.
- Warranty and Support: Most professional installations come with warranties, giving you peace of mind. If issues arise, support is readily available from the installation company.
Cons:
- Higher Cost: Professional installation can be significantly more expensive than DIY options, impacting your overall budget.
- Scheduling Conflicts: You may have to work around the installer’s schedule, which can delay your project.
- Limited Control: You might not have a say in the specific installation methods or materials used, which could lead to a less personalized result.
DIY Installation
Pros:
- Cost-Effective: DIY installation often saves you money, as you avoid labor costs associated with hiring professionals.
- Full Control: You have complete control over the installation process, allowing for personalized adjustments and changes as you see fit.
- Learning Experience: Completing a DIY project can enhance your skills and provide a sense of accomplishment once the job is finished.
Cons:
- Time-Consuming: DIY projects can take longer than anticipated, especially if you encounter unexpected challenges.
- Risk of Errors: Without professional experience, the likelihood of making mistakes increases, potentially leading to costly repairs or system malfunctions.
- Limited Warranty: Many DIY products may not offer warranties, leaving you responsible for any issues that arise post-installation.
By weighing the pros and cons of professional vs. DIY installation, you can choose the best approach for your specific needs and circumstances.
Read more: Professional vs DIY Home Security Systems
What Does a Security System Installer Do?
A security system installer plays a vital role in setting up and maintaining security systems for homes or businesses.
They ensure that all components work together seamlessly to protect against potential threats.
Here’s a detailed look at what a security system installer does.
1. Inspect the Premises
- Evaluate the property layout: Identify key entry points.
- Assess potential risks: Determine areas vulnerable to intrusion.
- Understand customer needs: Customize the system based on specific security concerns.
2. Design the Security System
- Create a tailored plan: Design a system that fits the property.
- Choose the right equipment: Select cameras, sensors, and control panels.
- Incorporate advanced features: Add smart integrations, such as remote monitoring.
3. Install Cameras and Sensors
- Mount cameras in strategic locations: Ensure full coverage of the property.
- Attach sensors to doors and windows: Monitor all possible entry points.
- Test the devices: Make sure cameras and sensors function properly after installation.
4. Connect and Configure the System
- Set up the control panel: Ensure proper placement and configuration.
- Connect to the home network: For wireless systems, establish a strong Wi-Fi connection.
- Program the system: Sync sensors, cameras, and alerts for optimal performance.
5. Train the Homeowner or Business Owner
- Demonstrate system operation: Show how to arm and disarm the system.
- Explain mobile app features: Guide the user on remote monitoring and alerts.
- Provide maintenance tips: Teach the basics of maintaining and troubleshooting the system.
6. Perform Routine Maintenance
- Check system components regularly: Ensure sensors and cameras are working properly.
- Update firmware and software: Keep the system secure from new threats.
- Replace faulty equipment: Swap out malfunctioning devices as needed.
7. Offer Professional Monitoring Services
- Connect to a monitoring center: Ensure 24/7 monitoring for emergency response.
- Set up alerts for the homeowner: Provide real-time notifications of any breaches.
- Recommend additional services: Suggest enhancements like fire or carbon monoxide detectors.
Troubleshooting Common Issues
Even with a well-installed home security system, you may encounter issues from time to time.
Here are some common problems and effective solutions to ensure your system operates smoothly.
Weak Signal or Connectivity Problems
- Check Wi-Fi Range and Signal Strength: If your cameras or devices are not responding or are frequently disconnecting, examine the Wi-Fi range. Use a mobile device to test the signal strength in different areas of your home, particularly where devices are installed.
- Reposition Your Router: Ensure your router is centrally located to provide better coverage. Avoid placing it near metal objects or thick walls that may block the signal.
- Consider Adding Wi-Fi Extenders or Boosters: If the signal is weak in certain areas, consider purchasing Wi-Fi extenders or boosters to enhance coverage. These devices can help ensure a stable connection for all components of your security system.
False Alarms
- Adjust Sensor Sensitivity: If your system triggers false alarms frequently, check the sensitivity settings on your motion detectors or door/window sensors. Lower the sensitivity to minimize responses to minor movements, such as pets or passing vehicles.
- Reconfigure Sensor Position: Ensure sensors are mounted correctly and not facing windows or heat sources, which can cause false triggers. Adjust their angles or positions to reduce the chances of false alarms.
- Perform Regular Tests: Conduct regular tests of your system to determine if any specific area or sensor is consistently causing issues. This can help identify if further adjustments are needed.
Component Malfunctions
- Reboot the System: If your control panel or any component becomes unresponsive, try rebooting the entire system. Power it down, wait a few moments, and then turn it back on to reset the connections.
- Reset Individual Components: For persistent issues with specific components (like cameras or sensors), consult the manufacturer’s instructions on how to reset them to factory settings. This often resolves minor glitches.
- Check for Software Updates: Ensure that your system’s software and firmware are up to date, as updates can fix bugs and improve performance.
By proactively addressing these common issues, you can maintain the effectiveness of your home security system and ensure it provides reliable protection for your home.
Wrap Up
proper installation of your home security system is vital for ensuring safety and protection.
Regular testing and maintenance are essential to keep your system functioning effectively.
Don’t hesitate to seek professional help if you encounter challenges. A well-installed security system not only deters intruders but also offers peace of mind, knowing your home is safeguarded.
Take the time to ensure your system is set up correctly, and enjoy the confidence it brings.
Frequently Asked Questions
What tools do I need to install a home security system?
To install a home security system, you typically need a screwdriver, drill, level, tape measure, and a pencil. Depending on the system, additional tools like wire strippers may be necessary. Always refer to the manufacturer’s instructions for specific requirements.
Can I install a home security system myself?
Yes, many modern home security systems are designed for DIY installation. They come with clear instructions, and some even feature wireless components, simplifying the process. However, if you’re unsure or have complex needs, consider hiring a professional for optimal results.
How long does it take to install a home security system?
The installation time for a home security system varies based on the type and complexity of the system. A simple DIY wireless system can take around 1-2 hours, while hardwired systems may require several hours or even a full day, especially for extensive setups.
Do I need a professional to install my security system?
While many systems are DIY-friendly, professional installation is advisable for complex systems or hardwired setups. Professionals can ensure proper placement of cameras and sensors, optimize system performance, and provide advice on the best security measures for your home.

Appreciate the recommendation. Let me try it out.
Hi everyone, it’s my first pay a quick visit at this site, and article is actually
fruitful for me, keep up posting these posts.
I am happy that it helped!
I don’t even know the way I ended up here, but I thought this post
used to be great. I don’t know who you might be however definitely you’re going to
a well-known blogger in the event you are not already.
Cheers!
Thank You!
I really like looking through a post that will make
men and women think. Also, many thanks for allowing for
me to comment!
I gotta favorite this site it seems very helpful very beneficial
Thank You!